This post may contain affiliate links. Read disclosure policy
If you’ve ever wondered how to make marshmallows, I have an easy marshmallow recipe for you! It takes a little bit of patience, but making your own marshmallows isn’t hard at all and they turn out perfectly soft, squishy, sweet, and full of that vanilla flavor!
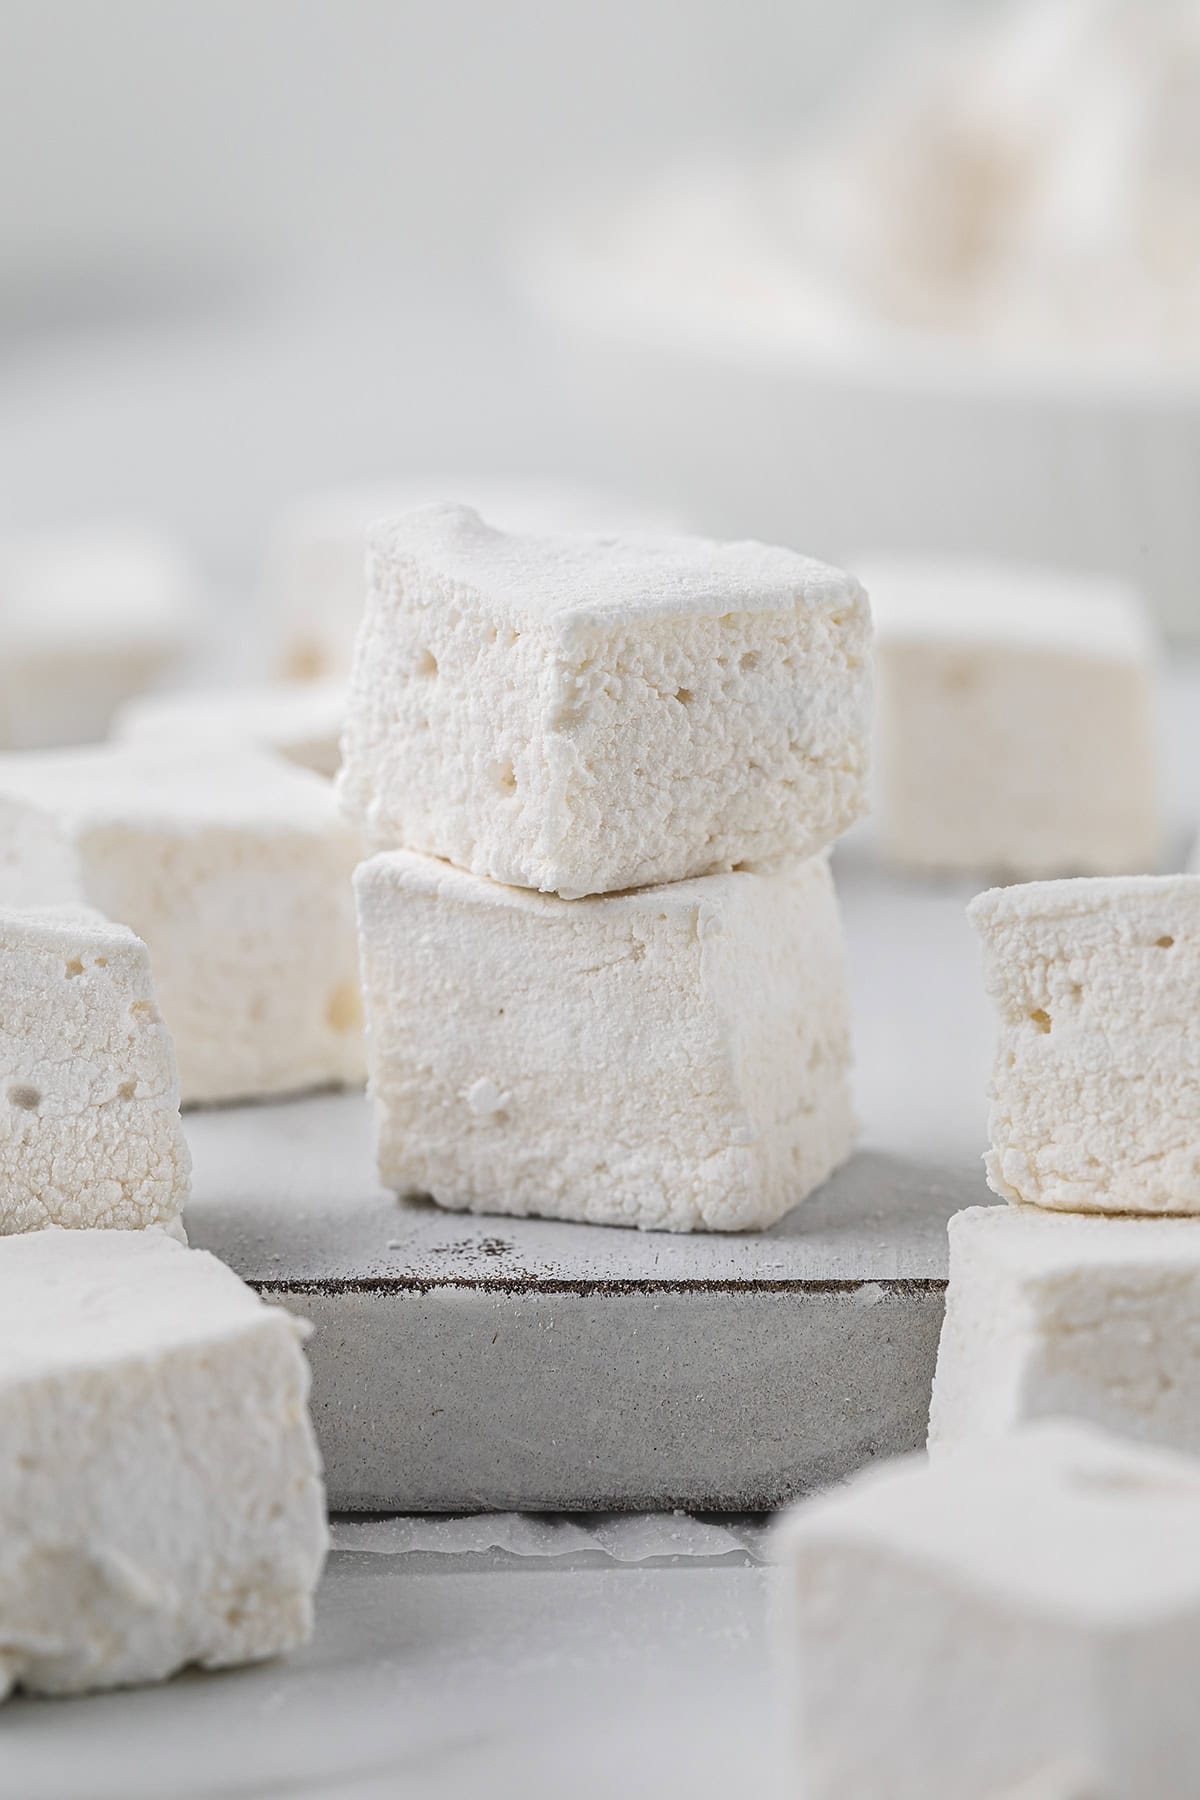
Making homemade marshmallows certainly isn’t for everyone, but if it sounds intriguing to you, keep on reading!

Messy? Sure. Worth it? Totally.
The first time I saw homemade marshmallows, I was shook. What do you mean not all marshmallows come shaped like little round barrels in a bag labeled Jet-Puffed??
It took no time at all for me to head home and whip up my own batch of homemade marshmallows using a recipe that is originally from Gourmet, but which I found over on Smitten Kitchen.
As Deb says, the process of making marshmallows isn’t difficult, but it can get messy. The best little tip is just don’t touch it. The more you touch the mixture, the more you’ll spread the mixture. Luckily, it cleans up so easily with a bit of warm water so it’s not a big deal, but personally, I do my best not to drape my kitchen in strands of sugary ‘mallow mixture.
These soft, squishy little marshmallows have a lovely sweet vanilla flavor – perfect for enjoying plain or toasting and squishing between a coupe of graham crackers with some chocolate.
Why Make Homemade Marshmallows?
These little marshmallows are light, fluffy, and springy. Honestly, they’re a totally different experience than the bag of marshmallows you buy for making rice krispies treats!
These marshmallows are full of sweet vanilla flavor and each bite is like a little fluffy, chewy bite of heaven.
These are perfect for a gourmet s’mores party, but they also make a sweet little gift. People love these little marshmallows!
Ingredient Notes:

Gelatin – You’ll need a few envelopes of unflavored gelatin for mixing with cold water and the other ingredients. This is what holds it all together and helps give the marshmallow its characteristic stretchy, puffy texture.
Sugar – We’re using both granulated and powdered sugar in this recipe.
Corn Syrup – We’re using light corn syrup (which is not the same as high fructose corn syrup) in this recipe.
Egg Whites – You’ll also need egg whites which you’ll beat into stiff peaks, much like if you were making meringue.
Vanilla – This is what adds the flavor. You could use other extracts for other flavored marshmallows if you like.
See the recipe card for full information on ingredients and quantities.
What We Love About This Recipe:
- Fresh: You can’t beat homemade for freshness and that’s just as true with this recipe for marshmallows! These are much better than the packaged variety, so light, springy, and fresh tasting.
- Customize: Slice the marshmallows to whatever size you like, big or small, and get creative with flavorings too. Marshmallow is a great vehicle for flavor. See below for some suggestions!
- Gift Giving: People think you’re magic when you make homemade marshmallows and they make a great little gift!
How To Make Marshmallows:

Boil some water, sugar, corn syrup, and salt until it reaches 240 degrees. This will take around 12 minutes. Use a candy thermometer for the best results.

Remove the pan from the heat and pour the hot sugar mixture into the stand mixer with the gelatin. Stir it to combine and dissolve the gelatin. Beat on high speed until it is white, thick, and has tripled in volume.
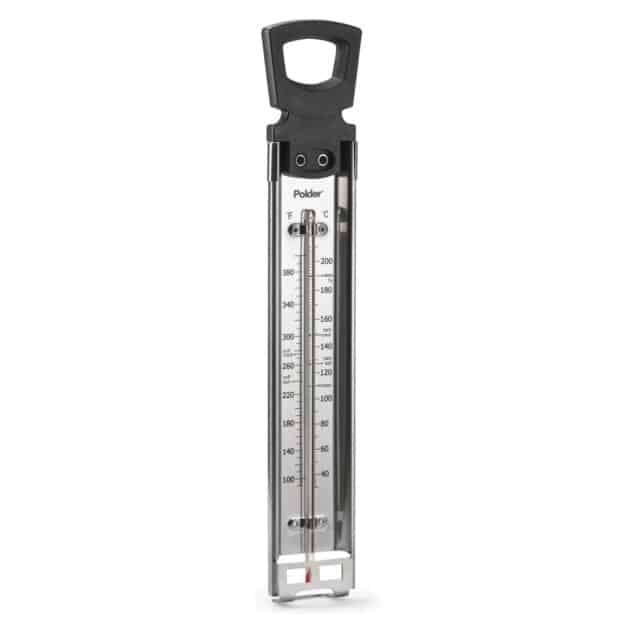
Candy/Deep Fry Thermometer!
It’s essential to maintain the right temperature while frying foods or making candy. This simple thermometer clips to your pan to make things a breeze.

In a separate bowl beat the egg whites until stiff peaks have formed, and then add those to the sugar mixture along with the vanilla extract. Beat together until just combined.

Spray a 9×13 with cooking spray, dust it liberally with powdered sugar, and pour in the marshmallow cream. Top it off with more powdered sugar and let it cool for 3 hours.

Carefully run a knife around the edge of the pan, flip and turn out the marshmallow block onto a cutting board. Cut into 1 inch squares and then toss them fully in more powdered sugar to coat. This will keep them from sticking.
Helpful Tip!
- Use a candy thermometer for the best results.
- A stand mixer is really going to make this easy, but this can be done with a hand mixer as well.
- When you’re pouring the marshmallow cream into the prepared pan, don’t worry about scraping it all out. You’ll end up with a bigger mess than it’s worth. Just dump and go.
What To Serve With Homemade Marshmallows:
This recipe for marshmallows can definitely be enjoyed all by itself if you’re just in the mood for a sweet snack but they go well with so many other things too! Here are some excellent options:
Hot Drinks – Marshmallow with hot cocoa? Definitely! You can chop these homemade marshmallows into much smaller pieces for serving with hot chocolate or even coffee! Try our white hot chocolate or Nutella hot chocolate!
S’mores – A favorite classic treat that would definitely benefit from using these homemade marshmallows. We like to roast them indoors under the broiler as homemade marshmallows do tend to melt a little more aggressively than store-bought, which can be tricky for roasting on a stick.
Fruit – Chop these up and toss them in a fruit salad, or serve up some fruit skewers with pieces of homemade marshmallow!

Flavored Marshmallows:
I mostly prefer just standard vanilla flavored marshmallows but you can get pretty creative with the flavorings when making homemade marshmallows.
I’ve got a few popular and less conventional recommendations:
Vanilla is my go to here but you could also use peppermint extract for the holidays, or try it with almond extract for a nutty flavor! Maple, coconut, strawberry, raspberry, and other fruits are good too.
These are a bit more unconventional but also work! Lavender extract or a few drops of rosewater will add a subtle floral flavor and fragrance.
Recipe FAQs:
You can store these homemade marshmallows in an airtight container at room temperature for about a week. They may last longer if stored in the refrigerator!
Our marshmallow recipe calls for coating each marshmallow in powdered sugar to help prevent it from sticking. You’ll shake off most of it so they aren’t overly sweet.
Yes, you can toast these though they may not toast quite the same as a regular marshmallow. Just keep an eye on them to be sure they don’t burn. We prefer to toast these under the broiler or with a kitchen torch rather than over an open fire.

Homemade Marshmallows
Ingredients
- 3 1/2 envelopes unflavored gelatin 2 tablespoons plus 2 1/2 teaspoons
- 1 cup cold water divided
- 2 cups granulated sugar
- 1/2 cup light corn syrup
- 1/4 teaspoon salt
- 2 large egg whites
- 1 tablespoon vanilla
- Powdered sugar as needed, about 1 cup
Instructions
- Liberally spray a 9×13 glass or metal pan with cooking spray. Dust the pan with powdered sugar.
- Sprinkle the gelatin over a half cup of the cold water in the bowl of your stand mixer fitted with the wire whisk. Let soften while you cook the syrup.
- In a 3 quart heavy bottomed sauce pan, cook the remaining half cup of cold water, sugar, corn syrup, and salt over low heat, stirring with a wooden spoon until the sugar has dissolved. Increase heat to medium and boil until mixture reaches 240 degrees, about 12 minutes.
- Remove the pan from the heat and pour the sugar mixture into the stand mixer with the gelatin. Stir to dissolve the gelatin.
- Beat on high speed until white, thick, and tripled in volume, about 6 minutes. This will take quite a bit longer if you're using a hand held mixer.
- Add the egg whites to a medium bowl and beat with an electric hand mixer until stiff peaks have formed.
- Add the egg whites and vanilla to the sugar mixture in the stand mixer and turn to low, mixing until just combined.
- Pour the mixture into the prepared baking dish, using a rubber spatula to scrape it out as needed, but being careful not to touch the goo with your hands. You won’t get it all out of the bowl and that’s okay.
- Sift 1/4 cup of powdered sugar over the top of the marshmallows and chill uncovered in the fridge for 3 hours or overnight.
- Run a knife along the edges of the pan and turn the marshmallows out onto a cutting board. Cut marshmallows into 1-inch cubes with a sharp knife or pizza cutter.
- Sift about 1/2 cup of powdered sugar back into the baking dish and toss the cut marshmallows in it to coat all sides and prevent them from sticking to each other.
- Shake off the exceess powdered sugar and store in an airtight container for up to one week.




nsuniversity.com says
I couldn’t resist commenting. Exceptionally well written!
Cheryl says
I love homemade marshmallows. I hope it’s ok to share my recipe on here.
Oh, and no egg whites needed for this one. I make it a lot and the grandson loves them and he loves to help make them into different shapes.
RECIPE FOR HOMEMADE MARSHMALLOWS
A stand mixer is really handy for this recipe, though it does work with a hand-held mixer. And you definitely need a candy thermometer. While the process of making marshmallows can be a little sticky, cleanup isn’t particularly onerous – since sugar easily dissolves in water.
Ingredients:
3 packages unflavored gelatin – 1/4oz. each
1 cup cool water, divided into two ½ cups
1-1/2 cups granulated sugar
1 cup light corn syrup
1/8 teaspoon salt
1 tablespoon vanilla extract
Nonstick spray and parchment paper
Directions:
1. Sprinkle the gelatin into the bottom of the mixing bowl. Pour 1/2 cup water into the bowl over the gelatin, to soften it.
2. In a large saucepan over medium heat, bring the remaining 1/2 cup of water, sugar, corn syrup and salt to a gentle simmer. Insert a thermometer in the pan and cook the mixture until it reaches 240 degrees F. Remove it from the heat immediately.
3. Put the whisk attachment on the stand mixer and turn the mixer on to low speed. Carefully and slowly pour the hot sugar mixture into the mixer. Once all the hot sugar mixture is in, increase the speed of the mixer to high. Let it whip until the mixture is very thick and white and has cooled to lukewarm, about 10 minutes. Add vanilla and whip an additional minute.
4. While the mixture is whipping, line a rectangular baking dish (9×13-inch) with straight sides and corners with parchment paper such that some of the paper overhangs the edges. Spray the pan and the paper with a coating of nonstick spray, then sprinkle in powdered sugar and move it around the pan until well-coated. This is much like flouring a cake pan. Tap the excess out and back into the small bowl for later. Spray a rubber spatula with the cooking spray.
5. Pour the whipped marshmallow mixture into the prepared pan, using the prepared spatula to spread it out evenly. Dust the top with additional powdered sugar, this helps aid in the spreading. Let the marshmallows sit uncovered for 1 to 2 hours to set up. To cut the marshmallows, lift up the parchment paper, pulling the sides of the paper away from the marshmallows. You can cut them using a knife, dusted with powdered sugar. Put the marshmallows into a bag that has about a cup of powdered sugar in it. Shake the the squares, or whatever shapes you’ve decided to make, to coat them, remove and shake off any excess.
These keep for several weeks if kept in an airtight container in a cool place.
If you wish to dip these in chocolate, place in freezer first, for about 30 minutes prior to dipping. It helps prevent them from melting into the chocolate. Also, feel free to make different flavors, shapes, and colors.
Karly says
They sound fabulous! 🙂
Collette says
Just put these in my fridge to set! I can’t wait. I’m a marshmallow virgin but your recipe looked too easy not to try! Barely any mess and it probably took 20 minutes to put together with two kids running around my legs. You’re right, it wasn’t hard! Everyone should make
Roxana | Roxana's Home Baking says
So I bought a candy thermometer a while back with the intention of making marshmallows, not I just need to find the courage and patience to make them. Yours are pure perfection Karly!
Karly says
Not even kidding, these are totally easy! You don’t need courage…just do it! 🙂
Kayle (The Cooking Actress) says
I neeeeeeeeeeeed to make homemade marshmallows!!! Ahhh they look so good!
shelly (cookies and cups) says
Yeah, I guess I’m impressed with this.
Homemade marshmallows ARE the gateway into making your own clothes. I heard that somewhere 🙂
Kathy Faberge says
I once made marshmallows many years ago and thought why am I doing this? I thought they were too much work. Have never attempted to make them again.
Jocelyn @BruCrew Life says
Homemade marshmallows have been on my must bake list for some time….but I keep putting it off because of the obvious mess! Your amazing looking marshmallows and that adorable sugar heart have me convinced I need to give it a try!
Dorothy @ Crazy for Crust says
I think homemade marshmallows are the bomb. They are SO good!!!! These are gorgeous Karly!
chelsea @ serves two says
oh i have homemade marshmallows on my (never-ending) kitchen bucket list! you may have officially sold me.